This shop has been compensated by Collective Bias, Inc. and its advertiser. All opinions are mine alone.
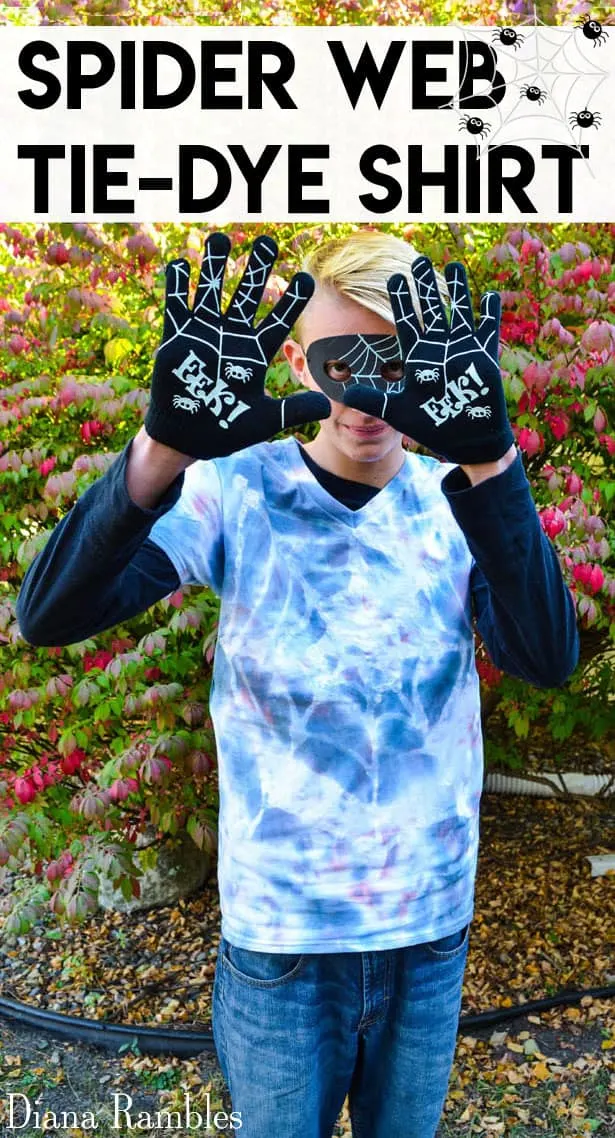
Learn how to make a Spider Web Halloween Tie-Dye shirt using a resist technique. It’s easy and fun to make, and super cute to wear around Halloween. It’s also perfect for a Halloween gift bag!


Back in 2001, we lived in Malaysia for four months. We enjoyed our time there taking in the sights and culture. One of our favorite activities (besides eating) was doing batik at the KL Cultural Center, where we could pay to do it by the hour. Batik is a wax-resist dying technique done on fabric. With the help of a local expert, we made some really neat designs, including a few we had professionally framed.
I have longed to do batik since we return to America…maybe that is why I love tie-dye so much. In my search for different tie-dye techniques, I’ve found a few designs done with gel glue as a resist—a form of batik! Excited, I picked up some gel glue and have been formulating a list of different designs I’d like to try.
With Halloween coming up, I thought it would be fun to create a spider web design on a T-shirt. I haven’t found a spider web Halloween tie-dye shirt anywhere on the web, so I knew I was onto something unique. Here is how I made it.
Spider Web Halloween Tie-Dye Shirt
Supplies
White T-shirt
Protective layer
Washable gel glue
Black and orange dyes
Rubber bands
Plastic gloves
Directions
Wash and dry shirt.
Lay shirt flat and place protective layer between front and back of the shirt. I used a half sheet of poster board.
Create spider web on the front of the shirt using the gel glue. Make sure the glue gets into the fabric, but don’t apply it too heavily, as it will spread.
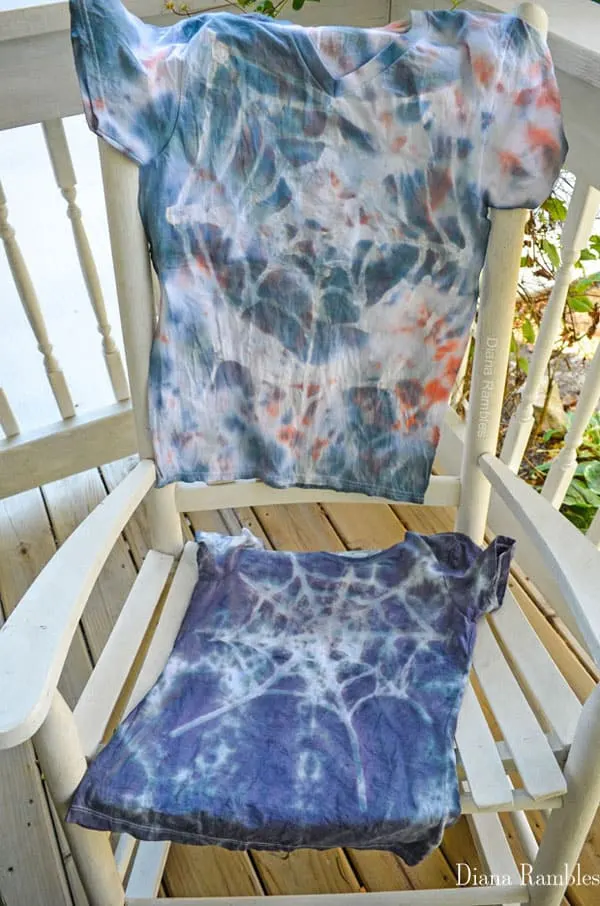
Leave it flat and let dry. I gave my shirt more than 24 hours to dry.
Crumple up the shirt and hold in place with rubber bands. I put my bands on just tight enough to hold the shirt crumbled. If they are really tight, then there will be a lot of white shirt showing.
Since the glue is washable, I didn’t soak the shirt in a soda ash mixture as you normally do with tie-dye. Instead, I put some soda ash mixture in a spray bottle to apply to the shirt.
Apply the orange and black dye. I just applied it randomly.
Place in a plastic bag and let the dye soak in. I let mine soak for about 24 hours.
Rinse out the dye with the rubber bands in place. I rinsed the shirt at the end of our driveway with the garden hose. The Google car drove by when we were rinsing our projects and we danced around and waved.
When the dye runs clear, remove the rubber bands. You will see the glue residue rinsing off.
I moved to my kitchen sink and kept rinsing with hot water until the glue was washed out.
Wash the shirt by itself in hot water.

We think the shirt turned out really cool. My son wore it and got lots of compliments. I thought it would be fun to make one for our neighbor to include in a fun BOO kit that I left on her porch.

What is a BOO Kit? It’s a gift bag or basket of Halloween goodies that is secretly left on the porch of family, friend, or neighbor. Here is the BOO Kit that I put together for our neighbor.

It included a Spider Web Halloween Tie-Dye Shirt, a pumpkin light, pumpkin straw, a giant Halloween pen, some Sunkist Halloween cans, a bag of mini and fun-size chocolate Mars candies, and a “You’ve Been BOO’d” Card all set in a Halloween gift box. How fun is that?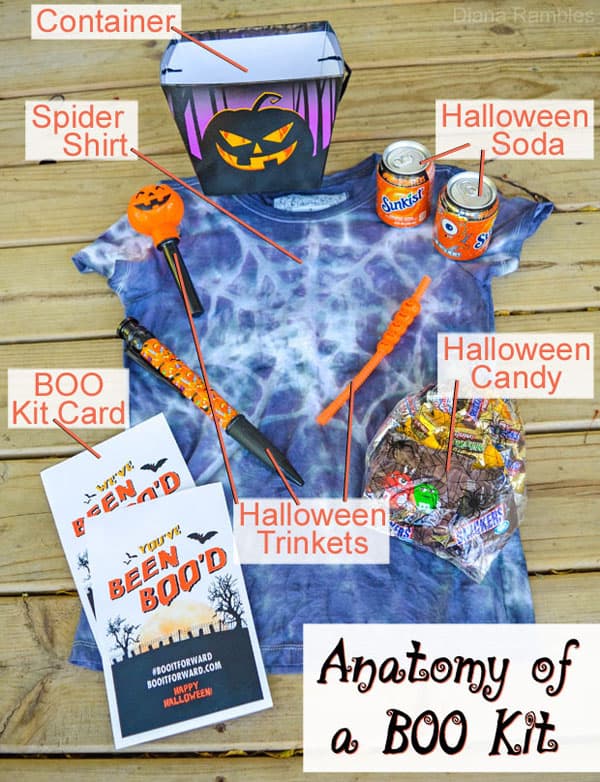

You can make a BOO Kit too! It’s easy and fun, and you just might get BOO’d back. Here is how you BOO!
Purchase some Halloween candy. I picked up a few monster-size variety bags of M&M’s®, SNICKERS®, TWIX®, MILKY WAY® and 3 MUSKETEERS® at Walmart. I found mine at this very cool Halloween candy display. You can also find them in the Halloween candy aisle.
Purchase some soda. I found these adorable mini Halloween cans of Sunkist® Soda in the soda aisle at Walmart.
Gather Halloween items to put into the BOO Kit. Make a Halloween tie-dye shirt. Purchase Halloween trinkets.
Get a container to put all the goodies in.
Print BOO Kit signs – Print the 2-page BOO Kit card and sign found here to put into the kit. The card says “You’ve been BOO’d!” and the sign says “We’ve been BOO’d!” which will hang on the front door or in a window after your neighbor receives their BOO Kit.
- Cut out the “We’ve been BOO’d sign.
- Fold the “You’ve been BOO’d” greeting card (page 2) and tape openings together.
- Include the card and sign when gifting BOO bundles.


Have you ever been BOO’d? Who do you want to BOO? Check out other BOO Kit ideas here.