
Seatback Refreshment Station Tutorial
Create a seatback refreshment station to help keep your vehicle clean and snacks and water within reach of your child.
We are well into the school year and used to our new routine. My kids have several extracurricular activities that keep me very busy driving around in the afternoons and evenings. I find that I am able to handle the crazy schedule the best when I am organized and plan ahead. I use a lot of to-do lists and notes to stay focused. That means planning ahead with food and drinks. I myself don’t function well if I skip a meal or snack, so I make sure that my kids don’t face the same issue. That means planning ahead for snacks/food and drinks on-the-go.
Food on-the-go means my car is a mess. I have wrappers and containers all over the place. It seems that every month or two it gets so bad that I have to clean it out. I take out a trash bag, a recycling bin, and a tote or basket for clothing and other items that don’t belong in the car. Each time I tell myself that we are going to stay more organized so it doesn’t become a mess. How’s that working out? Not very well!

Since a majority of the mess is related to food and drink, I thought it was time to make a refreshment organizer for the car. I like to take our favorite lunchbox and a bottle of water with us, so I decided to make a caddy to hold them both. This caddy has a strap that goes over the front seat headrest so that it hangs on the back of the seat in front of my daughter.

Want to make one yourself? Here are the directions.
Seatback Refreshment Station
Supplies
One Easy Lunchbox
A bottle of water (16.9 oz size)
Two pieces of fabric 11″x13″ (back piece)
One piece of interfacing 11″x13″
Two pieces of contrasting fabric 10″x20″ (pocket)
Two 10″ dowels (I used a 1/4″ dowel)
One 12″ of 1/4″ elastic

Directions
Sew the interfacing to the wrong side of one of the back pieces. I serged mine.
With right sides together, sew the back pieces as shown. Leave an opening for dowel casing along the bottom and opening to turn.

Turn the back right sides out and press.
Top stitch around the edges of the back piece to finish edge and form dowel casings along the top and bottom.

With right sides together, sew around the edge of the pocket piece leaving an opening to turn and casing for elastic.
Turn the pocket right sides out and press.
Top stitch around edge and form elastic casing.

Using an elastic threading tool to pull the elastic through the casing.

Sew elastic in place along both side edges. Make sure it is well gathered but can be stretched out the entire width of the pocket.

Carefully snip the extra elastic off.
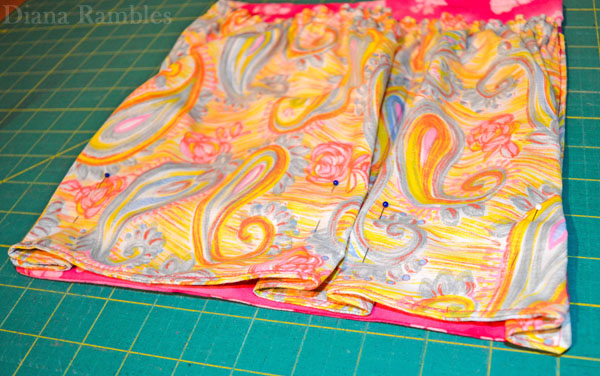
Pin the pocket to the front of the back piece lining up the outside edges.
Stitch along the outside edge, making sure you don’t catch any other parts of the pocket or the dowel casing.

Lay your lunchbox and water bottle on top to figure out where to the pocket separator line. Mine was 3.5″ in from the right edge.

Stitch the pocket separator line, making sure to give extra reinforcement to the top edge.
Create square pockets by folding and pinning in the extra pocket fabric as shown. My square edges were about 1″.
Stitch in place right along the top of the dowel casing seam, giving extra reinforcement to the square edges. I stitched mine from the back so I could follow this seam.

Take your strap fabric and iron in it half.
Open that up and fold each half into the middle fold and press.
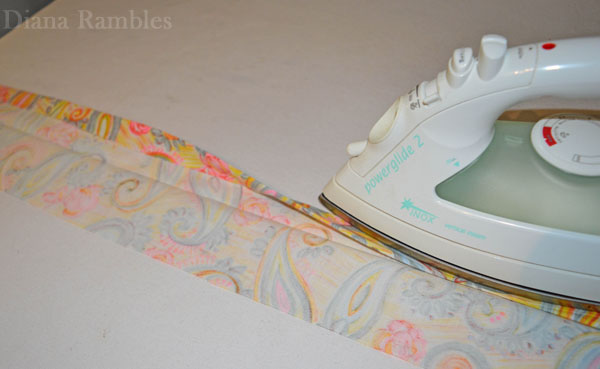
Press both those halves together and press.
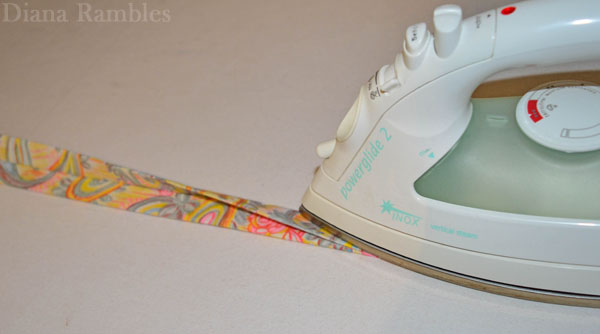
Top stitch along the open edge.
Attach one edge of the strap to the backside of the back. I used a zig-zag stitch back and forth to reinforce mine.

Calculate the placement of the other end of the strap by fitting it over the headrest.
Stitch in place.
Cut off extra strap.
Insert dowels into casings at top and bottom.
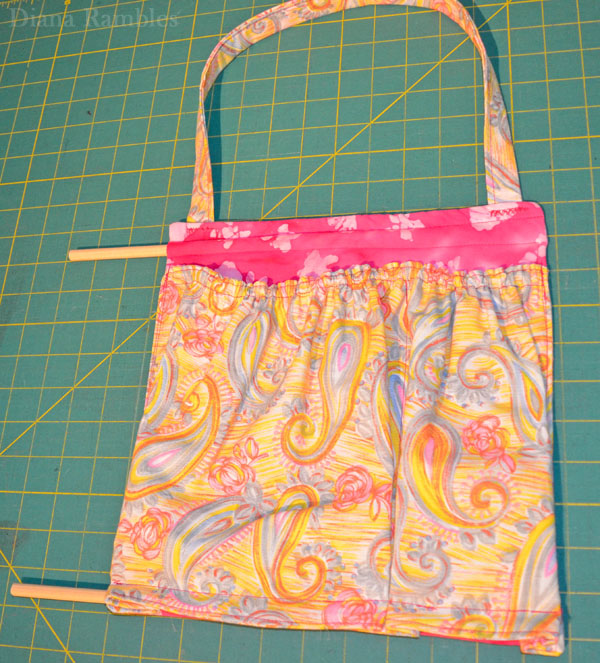
You are done!! That was fairly easy to make. Pick out some fun contrasting fabrics and make one for the back of all your car seats. Pack a lunch of snack in your lunchbox and grab a bottle of water and you are all set.
My daughter and I just love this refreshment caddy because it’s cute and functional. She has food and water within reach at all times!
Because we are getting older and want to be healthy in our retirement, my husband and I are making conscious choices to be healthy. That includes increasing our water intake. Talk with your family about the importance of a healthy lifestyle. In addition to eating a well-balanced diet and getting regular exercise, discuss drinking water and getting enough sleep as part of an overall healthy lifestyle.
My kids need to be healthy to participate in all their activities! Marching band, swimming, and ballet take a lot of energy, so my children drink a lot of water!
Do your kids drink enough water? What steps do you take to make sure they do?


Thank you for the feature!
Congratulations on the feature on Funtastic Friday. This turned out so nice, and it is so practical too.
I’ll check it out. What time does the party start?
This is such a cute idea, just luv it! I’d luv to invite you to share it with us at Wall to Wall DIY Wednesday Link Up!
Thanks for stopping by, Elizabeth.
I like this! I need to try it because my van often looks like your picture! Found you on Tip Me Tuesday.
What a great idea for the back of the seat! It’s easy to reach and it’s a little bag. Super Cute! Thanks for sharing at Merry Monday!
What a great idea for the back of the seat! It’s easy to reach and it’s a little bag. Super Cute! Thanks for sharing at Merry Monday!