DIY Heated Stuffed Animal
Do you love cuddling with a stuffed animal but also need some soothing heat for sore muscles or cold nights? Why not combine the two with a DIY Heated Stuffed Animal? You can turn a plush toy into a cozy, comforting heating pad with just a few supplies and basic hand-sewing skills.
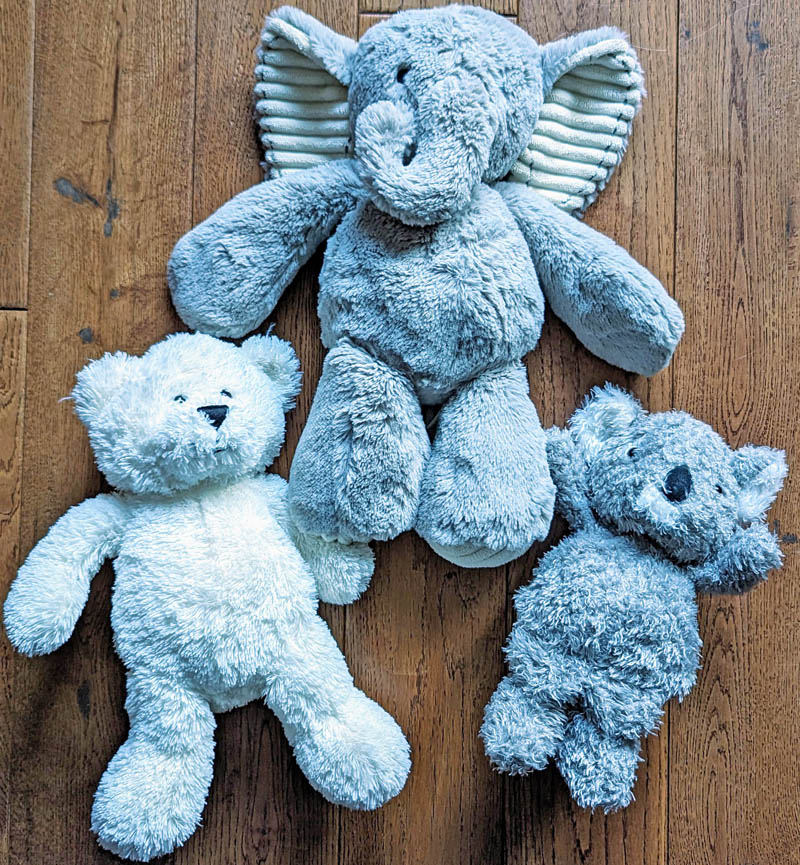
I have been recreating heating pads filled with rice that can be heated in the microwave for years. Lately, I have been bombarded with ads for stuffed animals that can be heated similarly. I am too frugal to buy one, so I made my own.
This easy tutorial will show how you can take a favorite stuffed plush animal and turn it into a heatable stuffie.
How to Make a Heated Stuffed Animal
Please note: Before creating, make sure the stuffed animal is microwave-safe.
It cannot have any metal or plastic parts.
For this project, you will need:
- A microwave-safe stuffed animal
- Seam ripper
- Rice (uncooked)
- Needle and thread
- Scissors
- Funnel (optional)

Directions
Step 1: Remove the stuffing
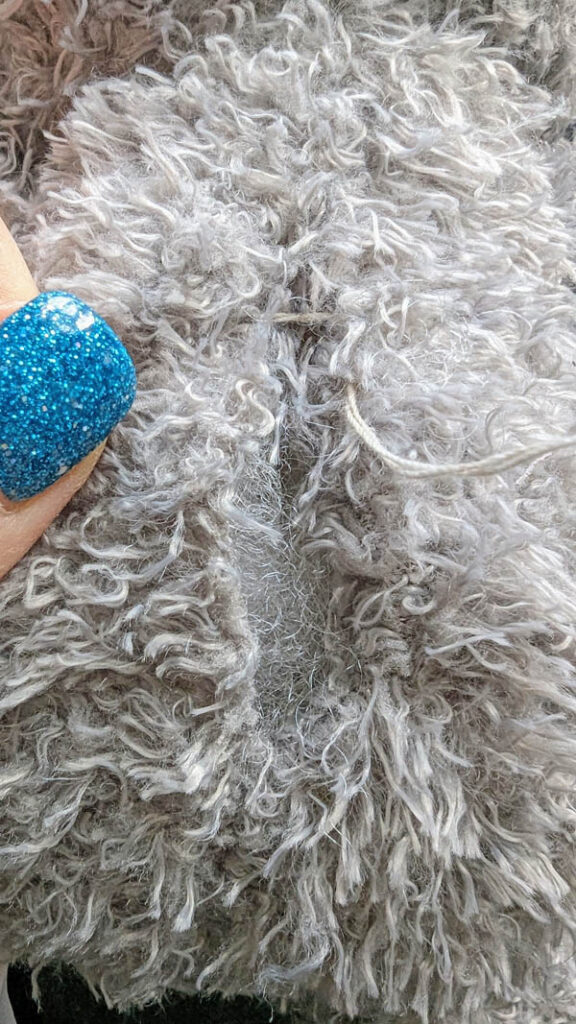
Using a seam ripper or small scissors, carefully open a seam on the back or underside of the stuffed animal, creating a small hole. Reach in and remove as much stuffing as possible, leaving a hollow cavity. Keep a tiny bit of the stuffing and save the rest for future projects.
Step 2: Fill with rice
Fill the cavity with uncooked rice using a funnel or spoon until it is about ⅔ full. Leave enough space for the rice to move around and mold to your body when heated. Refrain from filling or packing the rice too tightly. Place a small amount of stuffing between the rice and the seam opening. This helps block the rice from getting out of the hole.

Step 3: Stitch up the hole
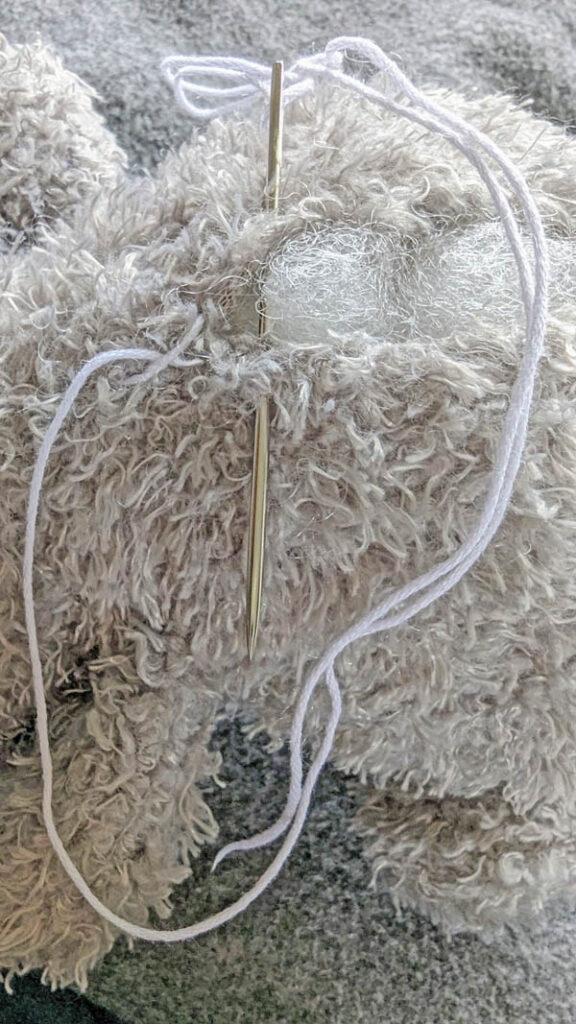
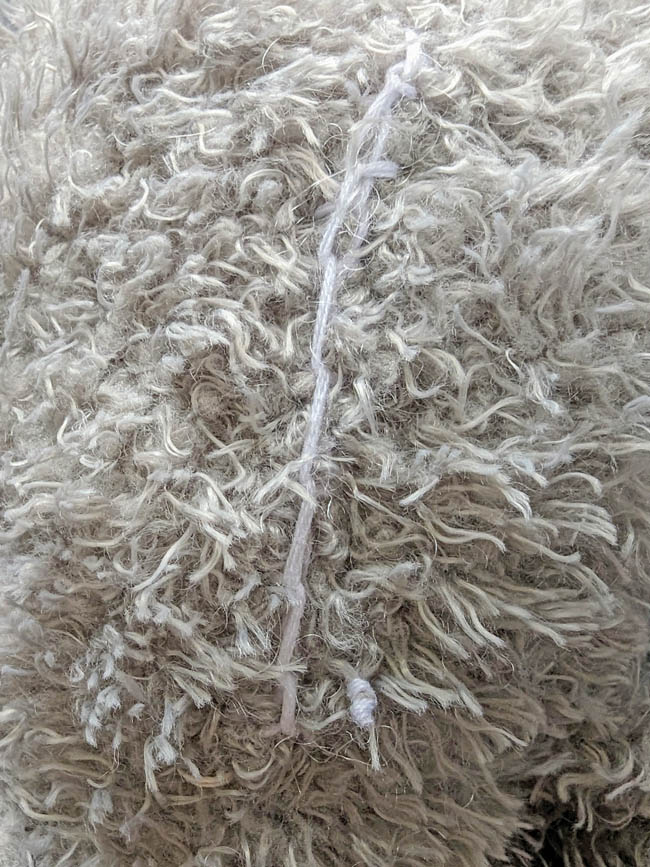
Sew the hole you created in Step 1 using a needle and thread. You can use a simple blanket stitch to close the seam. I changed directions and added a second line of stitching to ensure my stitches were tight and secure. Double-knot the thread to tie off at the end.
Step 4: Heat and enjoy!
Place your stuffed animal on a microwave-safe plate and heat it in the microwave for 45 seconds to 1 minute, adding time as needed. The exact time will depend on the size of your stuffed animal and the strength of your microwave, so start with 1 minute and check the temperature before heating more. Your plush heating pad should be warm but not too hot to the touch.
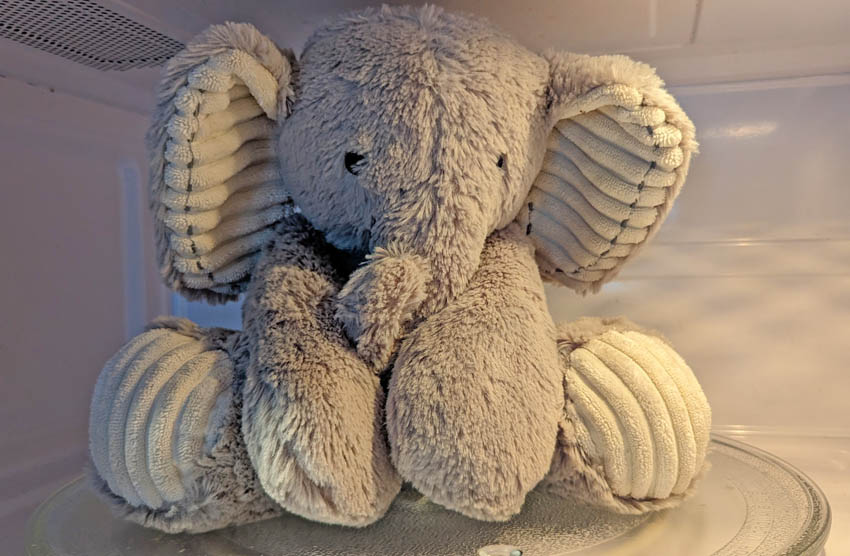
Now you can snuggle up with your new Heated Stuffed Animal and enjoy soft, huggable heat. This DIY project makes a great gift for kids or adults. Customize it with different rice blends or essential oils for added aromatherapy benefits. Stay cozy and comfortable all year round!
Create a quick heating pad by putting rice in an old sock and tying a knot in the end. You can also sew a contoured pad to heat a sore back or muscles.


Heated Stuffed Animal
Do you love cuddling with a stuffed animal but also need some soothing heat for sore muscles or cold nights? Why not combine the two with a DIY Heated Stuffed Animal? You can turn a plush toy into a cozy, comforting heating pad with just a few supplies and basic hand-sewing skills.
Materials
- A stuffed animal (make sure it's microwave-safe and doesn't have any metal or plastic parts)
- Rice (uncooked)
- Thick thread or embroidery floss
Tools
- Seam ripper
- Needle
- Scissors
- Funnel or spoon
- Microwave
Instructions
1. Start by carefully opening a seam on the underside or back of a stuffed toy to create a small hole.
2. Remove as much stuffing as possible from the hole until the toy is hollow, keeping a small amount of stuffing on hand.
3. Fill the hollow cavity with rice using a funnel or spoon, leaving enough room for the rice to move around. Fill it up to two-thirds capacity.
4. Add a small amount of stuffing between the rice and the seam opening.
5. Close the hole using a needle and thread with a blanket stitch. Add a second line of stitching in a different direction to ensure tight and secure stitches.
6. Tie off the thread with a double knot at the end.
7. Heat the stuffed animal on a microwave-safe plate for 45 seconds to 1 minute, depending on the toy's size and the microwave's strength. Check the temperature before heating more. Your plush heating pad should be warm but not too hot to the touch.
Notes
- Use caution when handling the heated stuffed animal, as it may be hot.
- Always start with a shorter heating time and check the temperature before heating more.
- You can also add a few drops of essential oil to the rice before heating for a soothing scent.
- This heating pad can relieve sore muscles or provide comforting warmth on a cold day.


