DIY Custom Suspenders
See how easy it is to make inexpensive Custom Suspenders using ironing board cover fasteners and ribbon.

My daughter has been wearing suspenders with some of her everyday outfits. She started making her own DIY suspenders with ribbon, so I asked her to write up a tutorial to share here on the blog.
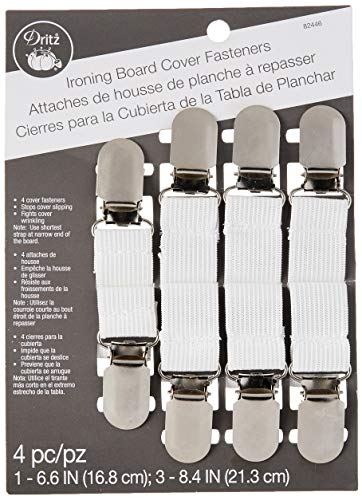
One day my mom came home with some ironing board cover fasteners that she got from a garage sale for a quarter.
She told that she thinks I can make a pair of suspenders, instead of ordering a pair online.
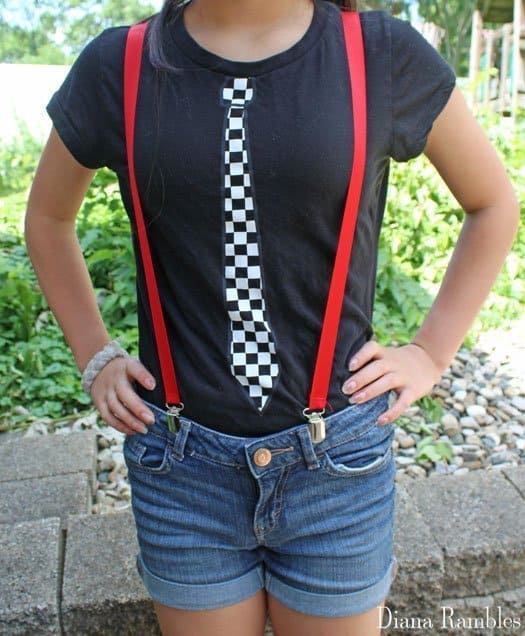
When we were picking ribbons at the store I chose simple colors that match most of my outfits.
You can use any print of ribbon no matter how silly it looks.
How to Make Custom Suspenders

We started by measuring the elastic connected to the clips to find the width of the ribbon we needed. It was determined that 5/8″ ribbon worked with these fasteners.
The pack had four fasteners with two clips on each.
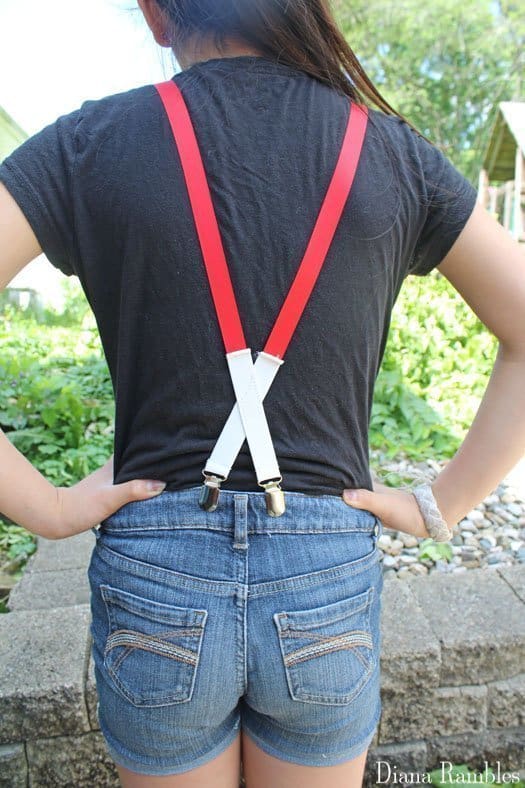
If you are making suspenders with cross elastics in the back, you will need four clips and if you are making suspenders with one elastic, you will need three.
DIY Suspenders Tutorial below

Thank you to my daughter for creating these suspenders. They really turned out cute!
Now you can show off your own custom suspenders! What ribbon did you use?
Projects For Youth


DIY Custom Suspenders with Ribbon
Create your own custom suspenders using ribbon
Materials
Tools
- scissors
- sewing machine
Instructions
- Taking the fasteners, I cut off the top close to the clip so I had enough elastic for the back of the suspenders.
- One side should be the clip with 4-5 inches of the elastic and the other side with about an inch of elastic to the clip.


- If you are making suspenders with crossed elastics, you will want to line them up and sew a diamond in the middle so the elastics are secure.


- Then you'll sew your ribbon to both sides of the x folding the elastic to the inside before sewing to prevent fraying.
- Test out where you want the suspenders to lay on you then once you know the placement you can take the other one-inch piece and cut the elastic off the clip.

- Attach the clip to the other side of the ribbon threading it through the clip then tack it down, then repeat to the other side.
- Then you have made your cross elastic suspenders.
- If you want to make the one elastic suspender, you take your 4-5 inch piece with the clip and add your ribbon.
- Because the ribbon needs to split over both your shoulders you can either cut 2 pieces to your length or fold the ribbon to make a V and sew the end of the elastic to the bottom of the V making sure the elastic has been folded in to prevent fraying.

- Cutting off the one inch of elastic from the clips you thread the ribbon through the clips and fold in adjusting to your size, you can try putting it on.
- To finish your custom suspenders you tack the loop you made through the clip down.

Notes
Jazz up your suspenders with printed ribbon.
Recommended Products
As an Amazon Associate and member of other affiliate programs, I earn from qualifying purchases.